

Article: Homemade Marshmallows with REAL Marshmallow Root (Yes, It's an Actual Plant)
Homemade Marshmallows with REAL Marshmallow Root (Yes, It's an Actual Plant)
Did you know marshmallows were originally made with an actual plant?

If you've been around Skin Balm Apothecary for a while, you know I have a love for herbs and traditional preparations. There's something fascinating about discovering how plants were used hundreds of years ago, especially when those same plants are still being used today.
Which brings me to marshmallows.
I recently decided to try making homemade marshmallows using an actual marshmallow root infusion, and after a little experimenting with the recipe, I wanted to share it with you!
But first, a little history, because I think this is what makes the whole thing so interesting!
History of Marrshmallows!
Marshmallow root comes from Althaea officinalis, a perennial herb belonging to the mallow family, Malvaceae.
The plant is native to parts of Europe, western Asia, and northern Africa and has a long history of use in traditional herbal medicine.
It gets its common name from its preference for growing in damp areas, including marshes.
And while the entire plant has been used in various traditional preparations, the root is particularly interesting because it contains something called mucilage.
Mucilage is a group of plant polysaccharides that become slippery and gel-like when mixed with water.
If you've ever worked with slippery elm, flaxseed, or chia seeds, you're probably familiar with this type of texture.
Marshmallow root has traditionally been used as a demulcent, meaning it can form a soothing coating over irritated tissues.
Historically, herbalists have used it in preparations for dry, irritated throats, occasional coughs, and mild digestive discomfort.
It's also been incorporated into topical preparations intended to soothe and comfort dry or irritated skin.
Now, this doesn't mean eating a homemade marshmallow is the equivalent of taking a therapeutic herbal preparation. The concentration of the herb, how it's extracted, and the final formulation all matter.
But I do think it's fascinating that an herb traditionally valued for its soothing properties eventually became associated with one of our most recognizable sweets.
We Love Marshmallow Root in Skincare, Too!
Marshmallow root is actually an herb we've incorporated into two of our formulations at Skin Balm Apothecary: our Herbal Lash Serum and Baby & Mom Balm.

Traditionally valued for its soothing and conditioning properties, marshmallow root has a long history of use in preparations for delicate, dry, and irritated skin.
We include it in our Herbal Lash Serum as part of a botanical blend intended to condition and care for the lashes and surrounding skin. In our Baby & Mom Balm, it's part of a gentle herbal oil infusion formulated to nourish and comfort sensitive skin.
Of course, different extraction methods draw out different constituents of a plant. Our oil infusion isn't the same as the mucilage-rich water infusion we're making for this recipe.
And that's one of the things I love about working with herbs. There are so many ways to incorporate them into everyday life!
So, How Did Marshmallow Root Become a Marshmallow?
This is where things get interesting.
If you search the history of marshmallows, you'll probably come across stories about ancient Egyptians making a sweet confection using marshmallow root and honey.
It's a story that's repeated quite often, although the historical evidence for the exact recipe is limited.
What we have much better documentation of is the development of marshmallow confections in France during the 1800s.
French confectioners made something called pâte de guimauve, a soft, sweet preparation associated with the marshmallow plant.
Early versions incorporated marshmallow root preparations along with sugar and, in some recipes, whipped egg whites.
Eventually, confectioners began using gelatin to create the familiar fluffy texture more efficiently and consistently.
Over time, marshmallow root disappeared from most commercial recipes altogether.
But the name stuck!
So the marshmallows we know today are essentially named after an herb that most of them no longer contain.
Making Homemade Marshmallows with Marshmallow Root
Before we get into the recipe, I want to mention that these are not necessarily the same as the original French marshmallows.
We're still using gelatin to create the fluffy texture we're familiar with today.
The difference is that we're replacing the plain water typically used to bloom gelatin with a cold infusion of actual marshmallow root.
This allows us to incorporate the herb into a modern homemade marshmallow recipe.
I also chose to use maple syrup instead of refined cane sugar.
And after making my first batch, I decided to reduce the amount of maple syrup because, while they turned out beautifully, they were a little sweeter than I preferred.
So this version is my adaptation of a traditional homemade marshmallow recipe, with a few changes to better suit my preferences.
One important note: I've successfully made the marshmallows using a lower syrup temperature of approximately 220°F, but the combination of that temperature and the reduced maple syrup amount is still experimental. Depending on your ingredients and cooking conditions, the marshmallows may turn out softer or stickier than a conventional recipe.
First, Let's Make Our Marshmallow Root Infusion
One of the things I love about marshmallow root is that it doesn't require a complicated preparation.
For this recipe, we're making what's called a cold infusion, sometimes referred to as a cold maceration.
Unlike many herbs that are steeped in hot water, marshmallow root is often prepared in cool water when the goal is to extract its mucilage.
Mucilage is water-soluble, and a cold infusion allows it to hydrate and disperse into the water.
Hot water can also extract mucilage, so it's not accurate to say that heat destroys all of its beneficial constituents. However, warmer preparations can extract more starch and produce a different consistency.
For this particular recipe, I prefer the cold infusion method.
Marshmallow Root Cold Infusion
Ingredients
-
¼ cup dried, cut-and-sifted marshmallow root
-
1 cup cool filtered water
Instructions
-
Place the dried marshmallow root in a clean glass jar.
-
Pour the cool filtered water over the root.
-
Cover and place in the refrigerator for approximately 8 to 12 hours.
-
Strain through a fine mesh strainer or cheesecloth, pressing the herbs to extract as much liquid as possible.
-
Measure out ⅓ cup of the strained infusion for your marshmallow recipe.
You'll probably notice that the liquid feels a little thicker or more slippery than plain water.
That's the mucilage!
The exact thickness will vary depending on the marshmallow root you're using, how finely it's cut, and how long you allow it to infuse.
I recommend preparing the infusion the night before you plan to make your marshmallows.
Homemade Vanilla Maple Marshmallows
Ingredients
-
¾ cup pure maple syrup
-
1 tablespoon unflavored grass-fed beef gelatin powder
-
⅓ cup cold marshmallow root infusion
-
1 teaspoon pure vanilla extract
-
¼ teaspoon fine sea salt
-
Arrowroot powder, for coating after cutting
-
Parchment paper to line your pan
Equipment
-
Small saucepan
-
Candy Thermometer
-
Stand mixer or hand mixer (I have used both and they both work just fine! Just be ready to have patience and mix for 10 mins with a hand mixer!)
-
8 × 8-inch baking dish
-
Spatula
Instructions
1. Prepare your pan.
Line a 8 × 8-inch baking dish with parchment paper I have used oil before and arrowroot powder in a pinch and it worked okay..
2. Bloom your gelatin.
Pour ⅓ cup of your cold marshmallow root infusion into the bowl of your stand mixer.
Sprinkle the gelatin evenly over the liquid and allow it to sit for approximately 5 to 10 minutes.
The gelatin will absorb the liquid and become thick.
3. Heat your maple syrup.
Add the maple syrup and sea salt to a small saucepan.
Heat over medium heat, monitoring the temperature with a candy thermometer.
For my experimental variation, I heat the syrup to approximately 220°F.
Keep in mind that conventional marshmallow recipes often cook the syrup to a higher temperature. Lower cooking temperatures retain more moisture and may produce a softer, stickier marshmallow.
If you live at a higher elevation, you'll also need to account for the lower boiling point of water when interpreting candy temperatures.
4. Combine the syrup and gelatin.
Once your syrup reaches the desired temperature, carefully begin mixing the bloomed gelatin on low speed.
Slowly pour the hot maple syrup into the bowl while the mixer is running.
Be careful here. Hot syrup can cause serious burns.
5. Whip until fluffy.
Gradually increase the mixer speed to medium-high or high.
Add your vanilla.
Continue whipping for approximately 10 to 15 minutes, or until the mixture becomes thick, pale, and fluffy.
You'll notice it increase significantly in volume.
6. Transfer to your pan.
Working fairly quickly, transfer the marshmallow mixture into your prepared baking dish.
Use a lightly greased spatula to spread it evenly.
The mixture will become more difficult to work with as it cools and begins setting.
7. Allow the marshmallows to set.
Let the marshmallows rest until firm enough to cut.
This may take approximately 6 hours at room temperature, although the exact setting time will depend on your recipe and environment.
You can also refrigerate them to help them firm up but they may come out a bit denser. I prefer to let them sit over night on the counter
8. Cut and coat with arrowroot powder.
Once your marshmallows have set, remove them from the pan and cut them into your desired shapes.
Now comes the arrowroot powder!
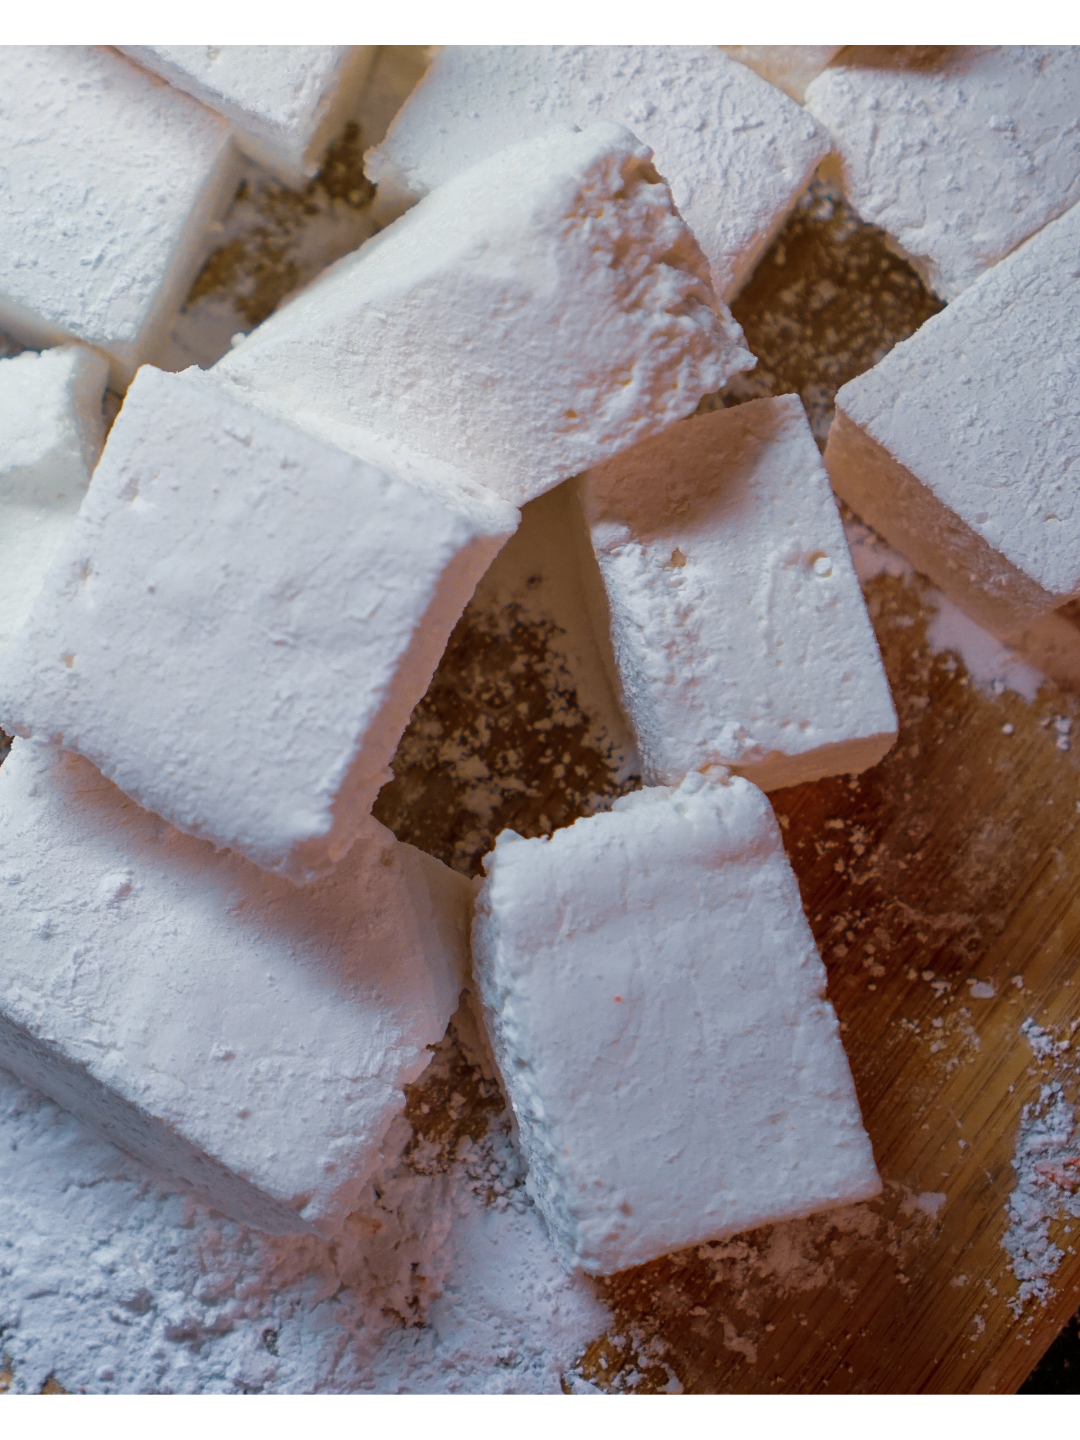
Lightly sprinkle or toss the marshmallows with arrowroot powder, making sure to coat the sticky cut sides.
This helps prevent them from sticking to one another.
And that's it!
Homemade vanilla maple marshmallows made with actual marshmallow root.
Why I Reduced the Maple Syrup
The original recipe I experimented with called for 1 cup of maple syrup.
And while the marshmallows turned out nicely, I found them a little too sweet for my preference.
So I decided to reduce the amount to ¾ cup.
That's a 25% reduction in the maple syrup.
Now, it's important to understand that sugar doesn't just provide sweetness in marshmallows.
It also contributes to their structure and texture.
Reducing the syrup changes the balance of sugar and water in the recipe, which can affect how firmly the marshmallows set and how sticky they become.
For that reason, I consider this version a recipe I'm still experimenting with rather than a fully tested replacement for a conventional marshmallow formula.
If you prefer a firmer, more traditional marshmallow, you may want to begin with a recipe uses the full amount of sweetener.
What If You Don't Have Marshmallow Root?
No marshmallow root on hand? No problem!
You can absolutely make homemade marshmallows without it.
Simply replace the ⅓ cup of marshmallow root infusion in this recipe with ⅓ cup of cool water and use it to bloom your gelatin.
Of course, you won't be incorporating the traditional herb that originally gave marshmallows their name, but you'll still have a homemade marshmallow!
And if maple syrup isn't your favorite sweetener, there are plenty of other homemade marshmallow recipes available that use cane sugar, honey, or other alternatives.
I'd encourage you to explore those recipes and find one that works best for you.
Just remember that different sweeteners behave differently when heated, so I wouldn't recommend swapping them directly into this particular recipe without making other adjustments.
That's part of the fun of making things from scratch. There's always something new to experiment with!
A Few Things I've Learned Along the Way
The temperature of your syrup matters.
One of the biggest factors in marshmallow texture is how much water remains in your cooked syrup.
Cooking to a lower temperature generally means retaining more moisture.
That can create a softer texture, but it can also increase stickiness.
Don't underestimate the whipping time.
Whipping incorporates air into the mixture and helps create that light, fluffy texture.
If you stop too early, your marshmallows may turn out denser than expected.
Have your pan ready before you start.
Once the marshmallow mixture is whipped, it begins setting as it cools.
You don't want to be scrambling to prepare your baking dish while your marshmallows are becoming increasingly difficult to spread!
The herbal infusion doesn't replace the gelatin.
Although marshmallow root contains mucilage, it doesn't create the same firm, elastic structure as gelatin.
We're incorporating the infusion for its botanical character and connection to the traditional plant, not relying on it to set the marshmallows.
You can experiment with the amount of marshmallow root.
A stronger infusion may produce a thicker liquid, but more herb doesn't automatically mean better marshmallows.
Changing the concentration could affect the consistency, and I haven't tested every variation.
If you're interested in experimenting, I'd recommend starting with the recipe as written and making small adjustments from there.
How Should You Store Homemade Marshmallows?
This is one area where I want to be particularly careful.
Many traditional homemade marshmallow recipes can be stored at room temperature for a period of time because of their high sugar concentration and relatively low moisture content.
However, this recipe is a little different.
We're incorporating a freshly prepared herbal infusion, reducing the amount of maple syrup, and experimenting with a lower cooking temperature.
For now, I recommend keeping them in an airtight container in the refrigerator and enjoying them within approximately 5 days
Refrigeration can make gelatin-based marshmallows firmer, and condensation may cause some stickiness.
If that happens, you can lightly dust them with additional arrowroot powder.
A Few Sources for Further Reading
If you'd like to learn more about marshmallow root, its traditional uses, or the history of marshmallow confections, these are a few resources worth exploring:
-
European Medicines Agency: Herbal monograph and assessment information for Althaea officinalis root
-
Smithsonian Magazine: Articles exploring the history of marshmallows
-
King Arthur Baking: Homemade marshmallow recipes and baking guidance
-
Sally's Baking Addiction: Homemade marshmallow preparation and troubleshooting
A little herbal note: The traditional uses discussed in this article are shared for educational purposes. They shouldn't be interpreted as evidence that these marshmallows treat or prevent any medical condition.

